Summertime Saga Maria Route Complete Guide
Maria is one of the most important characters in Summertime Saga and the emotional heart of the entire main story. This guide covers who Maria is, her role in the game, every step of her walkthrough from first meeting to pregnancy to the final act, all optional scenes, required stats, key items, and tips for completing her arc without missing anything.
Who Is Maria?
Maria is one of the central adult characters in Summertime Saga and the emotional core of the main story arc. She is Tony’s wife and co-owner of the local Pizzeria in Summerville. Every scene with Maria is rooted in her deep love for Tony, her passion for cooking, and the profound personal pain she and Tony share over their inability to have children.
On the surface Maria is warm, nurturing, and motherly. She runs the kitchen with total confidence, takes immense pride in her handmade pizzas, and treats the main character with genuine kindness from the moment he begins working at the restaurant. Below that warmth is a fierce, protective side that emerges the moment her family is threatened. When Russian Mafia thugs arrive to intimidate the pizzeria, Maria does not hide. She stands alongside Tony with a shotgun and helps drive them away, which is one of the most memorable character moments in the game.
Her greatest source of pain is the fact that she and Tony cannot conceive. They want to adopt but do not meet the requirements. This is the emotional engine that drives the central request of Tony’s storyline and ultimately draws the main character into a uniquely intimate role in their lives.
Pizza Teacher
Pizzeria KitchenMaria personally teaches the main character how to make authentic handmade pizzas in the Italian Job stage. This is your first real one-on-one interaction with her and sets the tone for everything that follows.
Mafia Defender
Pizzeria Storage RoomWhen Russian thugs confront the pizzeria, Maria stands beside Tony with a shotgun and helps drive them away. This is the scene that most clearly reveals her fierce, protective character beneath the warm exterior.
Emotional Core
Tony’s Story ArcMaria and Tony’s inability to have children is the emotional backbone of the main storyline. Tony’s request that the main character make Maria pregnant is one of the most unusual and story-critical moments in the game.
Story Milestone
HospitalMaria’s pregnancy and the birth of her child at the hospital is a required milestone to complete the main story. Missing the hospital scene by ignoring messages blocks further main story progression.
Maria’s Role in the Game
Maria is not a standalone character route like Jenny, Diane, or Roxxy. She does not have a dedicated story branch that can be pursued independently. Instead her arc is woven entirely into the Main Story and plays out across all three main story parts as the protagonist works at Tony’s pizzeria and becomes increasingly involved in the family’s lives.
Understanding this distinction matters because you cannot pursue Maria by visiting the pizzeria whenever you want and talking to her. Progress only happens when the delivery count and in-game day milestones are met, which trigger new scenes automatically. The route is paced by Tony’s story, not by Maria’s own quest log entry.
Maria’s Four Key Functions in the Story
How she contributes across all three main story parts
Pizza Instructor and First Connection
Maria’s first named scene is the Italian Job stage where she teaches the main character to make handmade pizzas. This scene establishes her personality and begins the personal relationship between her and the protagonist that makes Tony’s later request feel meaningful rather than arbitrary.
Active Ally Against the Russian Mafia
Maria is not a passive character who stays in the kitchen while the men handle threats. When the Russian thugs arrive to intimidate the pizzeria she picks up a shotgun and helps drive them off alongside Tony. This moment recontextualises her as someone with genuine agency and courage in the story.
Mandatory Pregnancy Requirement
Getting Maria pregnant is a hard requirement to complete the main story. After Tony reveals that they cannot have children and cannot adopt, he asks the main character to help. The storage room scene where you choose to get her pregnant is the central gating event that unlocks the final act of the main story. You cannot proceed without it.
⚠️ Story-mandatory sceneSupporting Presence in the Final Act
In Main Story Part 3, Maria appears at Tony’s apartment resting with a cold while the main character retrieves equipment for the final confrontation. She is present at the pizzeria when everyone regroups after the warehouse rescue and represents the human reason behind everything Tony has done throughout the story.
Prerequisites Before Starting
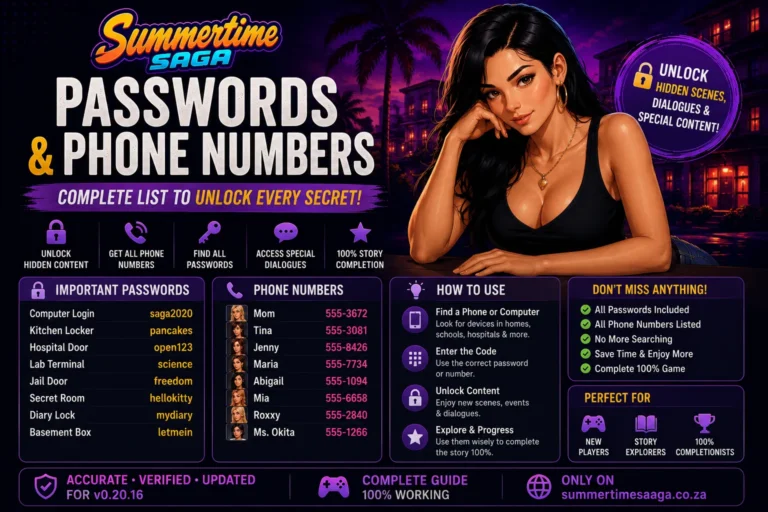
Before Maria’s storyline events can begin to unfold you need to have completed specific story beats and reached certain stat thresholds. Maria’s scenes do not trigger simply by visiting the pizzeria. They unlock through a chain of delivery milestones, day counts, and stat requirements that must all be satisfied in the correct order.
| Stat | Required Level | When Needed | Where to Train |
|---|---|---|---|
| Dexterity | 4 | Early story — unlocking Josephine’s help | Mr. Sato’s office diversion / yoga |
| Strength | 5 | Mid-story — moving the flour sack | Gym with Coach Bridget |
| Charisma | 10 | Main Story Part 2 — Rump mansion | Library / social activities |
| Dexterity | 10 | Final boss fight — Dimitri battle | Advanced gym training |
| Strength | 10 | Final boss fight — Raz struggle | Advanced gym training |
From the moment Tony hires you, the Russian Mafia begins ambushing you randomly during the day and can steal your cash. Multiple vehicle purchases are required totalling well over $6,000 across the route. If you walk around with large amounts of cash and get ambushed you will lose it all. Deposit after every single delivery without exception.
Complete the Prologue first. Meet Jenny and Debbie at home, go to school, meet Mia, Roxxy, Dexter, the Principal, Kevin, Annie, and Ms. Bissette. This unlocks the full map.
Survive the Russian thugs over the first two visits. Day 2 after prologue brings Harold and Yumi. Two more days later the thugs interrupt breakfast. Five days after that they return to intimidate you.
Wait for Tony’s rescue. Eleven days after the last thugs encounter you are ambushed outside and Tony intervenes. This is the event that unlocks the pizzeria on the map.
Buy a bike from Consum-R and complete your first successful pizza delivery in the correct order to be officially hired. Maria’s arc begins immediately after this.
How to Unlock Maria
Maria is unlocked as part of the natural main story flow. There is no separate trigger you need to find. The chain of events that leads to her first real scene runs through Tony’s employment offer and your pizza delivery work. Follow the steps below in order and Maria’s scenes will appear automatically at the correct delivery and day milestones.
Maria Unlock Chain
The exact sequence from prologue to first Maria scene
Complete the Prologue and Survive Three Thug Encounters
Work through the prologue events at home and school, then wait out the three Russian thug appearances at your house over the following days. These events must happen before Tony can appear to save you.
Tony Saves You from the Ambush
Eleven days after your last thug encounter you will be ambushed in the street and Tony will intervene. Visit his restaurant the next day to thank him. He offers you the pizza delivery job at this point.
Buy a Bike and Complete Your First Delivery
Purchase a bike from Consum-R. Return to the pizzeria and successfully deliver pizzas in the correct order. You are hired. The Russian Mafia ambush system activates from this point — start banking money immediately.
⚠️ Bank money after every delivery from here onAfter 5 Deliveries and 4 Days Passed: Maria Appears
Once you have completed 5 successful deliveries and at least 4 days have passed since hiring, Maria introduces you to pizza making in the Italian Job stage. This is your first direct scene with her and unlocks all subsequent interactions in her arc. Both the delivery count and the day count must be satisfied.
Step-by-Step Maria Walkthrough
Maria’s scenes are spread across seven distinct stages of the main story. Each stage has specific delivery count requirements, day count requirements, and in some cases stat requirements that must all be met before the next stage triggers. The stages below are listed in the exact order they occur during a normal main story playthrough.
Veni, Vidi, Tony
Unlocking the Pizzeria and getting hired
Visit Tony’s Restaurant After the Ambush Rescue
The day after Tony saves you from the Russian ambush, go to his restaurant to thank him. He offers you a pizza delivery job. Accept it to begin your employment and unlock all of Maria’s subsequent scenes.
Buy a Bike from Consum-R
Purchase the bike from Consum-R. This is your first delivery vehicle and the only vehicle required for your initial deliveries before the scooter upgrade.
Complete a Successful Delivery in the Correct Order
Return to the pizzeria and make your first successful delivery, following the drop-off order correctly. You are now officially hired. Mafia ambushes begin from this point. Set up a regular banking habit immediately.
⚠️ Mafia ambushes now active during the dayThe Scooter
3 successful deliveries and 3 days passed required
Meet Tina at the Pizzeria
After 3 deliveries and 3 days have passed, you meet Tina at the pizzeria. Tony tells you to get a better vehicle. Go to Saga Dealership. The receptionist is unhelpful and the salesman is rude. Find Josephine.
Get a Cell Phone for Josephine
Josephine agrees to help if you get her a cell phone. With Dexterity 4, go to Mr. Sato’s office and create a diversion to obtain the phone. Return the phone to Josephine to unlock her cooperation.
Buy the Scooter for $1,100 and Show Tony
Josephine offers you a scooter for $1,100. Buy it and return to show Tony. This completes the scooter stage and starts the countdown toward the Italian Job stage where Maria first appears.
The Italian Job
5 more deliveries and 4 days passed required
Maria Introduces You to Pizza Making
After 5 more successful deliveries and 4 days have passed, Maria invites you into the kitchen and introduces you to the art of authentic handmade pizza. This is your first real interaction with her and the scene that establishes her warmth, skill, and the easy rapport she develops with the main character.
Make 4 Handmade Pizzas Successfully
You must make 4 handmade pizzas by following Maria’s on-screen instructions carefully. This is a minigame. Pay close attention to each step she demonstrates. Making all 4 correctly unlocks the optional Mise en Bouche bonus scene later. Failing is not permanently punishing but completing it correctly is worth the effort.
🔮 Complete all 4 correctly for bonus scene unlockTony Reveals His Personal Struggle the Next Day
The day after the pizza lesson, Tony confides in you about his greatest source of pain: he and Maria cannot have children and they do not qualify to adopt. This conversation is the emotional setup for the request that comes later and gives the eventual storage room scene the weight it deserves.
Don’t Bring a Knife to a Gun Fight
8 total deliveries and 5 days passed required
Get the Small Car First
Before this stage triggers you must also complete the small car arc. Tony tells you to get a new car after 4 more deliveries. The mechanic at the dealership needs a tool bag. Get a swimsuit at the mall, get pool access via the midnight swim event, retrieve the bag from the fourth stall in the locker room, and return to Jiang for the city car at $4,500. Show it to Tony.
Move the Flour Sack with Strength 5
With Tina present at the pizzeria, go to the storage room. You need Strength 5 to move the sack of flour. If you have not reached this level the story is blocked here. Train at the gym with Coach Bridget until you reach Strength 5, then return.
⚠️ Story blocked without Strength 5 — train firstMaria and Tony Drive Off the Russians
After the flour sack is moved, Russian thugs arrive to confront the pizzeria. Maria and Tony face them down with a shotgun and send them fleeing. This scene is the clearest expression of Maria’s protective, fierce character and one of the most impactful moments in her arc. It is also what triggers the escalating confrontation that leads toward the main story climax.
Fast and Furious
7 more deliveries required after Stage 4
Tony Requests the Sports Car
After 7 more successful deliveries, go to the pizzeria the next day. Tony wants an even faster vehicle. Go to the dealership.
Steal the Vest from the Office for Josephine
Josephine requires a vest from the dealership office before she will help you with the sports car. Retrieve it carefully and return to her.
Buy the Sports Car and Show Tony
Purchase the sports car from the dealership and return to show Tony. Completing this stage sets up the final vehicle milestone and moves you toward the pivotal storage room scene with Maria.
What Happens in the Pizzeria
10 more deliveries and 4 days passed required
Complete the Tina and Becca Scene
Tony sends you to room 301 in the apartment building for a special delivery. You have a scene with Tina and her daughter Becca walks in on you. If you bought the beach house you must sleep at Debbie’s house before this stage will progress.
Visit the Dealership After Josephine’s Call
The next morning Josephine calls you. Go to the dealership and witness the strange interaction between Mayor Rump and Kim. Report to Josephine in the office for her scene.
Tony Makes His Request
In the afternoon go to the restaurant. Tony praises your work. The next morning he tells you about his request: he asks you to make Maria pregnant. This is the most important story beat in Maria’s entire arc.
Save Your Game Here Before Going to the Storage Room
Before you go to the pizzeria storage room in the evening, save your game. This is a branching point. Once the scene begins you are committed. The storage room scene with Maria is where you choose to get her pregnant. Select yes to continue the main story. This scene is added to the Cookie Jar automatically and the pregnancy timeline begins from this moment.
⚠️ Save here — this is a permanent branching pointThe Hideout
One week after making Maria pregnant
Tony Calls with the Good News
One week after the storage room scene, Tony calls to share the news that Maria is pregnant. Go to the restaurant to celebrate with them. You receive the address of the Russian hideout and binoculars from the treehouse.
Spy on the Warehouse in the Evening
That evening go to the warehouse to spy on the Russian hideout using the binoculars from the treehouse. While watching, a shot rings out and you are knocked unconscious. This event concludes Maria’s direct active story role in Part 1 and transitions the narrative into Main Story Part 2, the political corruption arc involving Mayor Rump.
Maria’s Optional Scenes
Maria has three optional bonus scenes in addition to her main story interactions. None of these are permanently missable in the traditional sense, but two of them require specific conditions to be met during the main story flow. All three are added to the Cookie Jar when triggered and can be replayed freely afterwards.
Mise en Bouche
Pizzeria KitchenTriggered by successfully completing all 4 handmade pizzas in the Italian Job stage. Maria demonstrates her legendary kneading technique in a very intimate bonus scene. Available after Stage 3. Missing this requires redoing the pizza minigame correctly before the stage advances.
Kiss the Chef
Pizzeria Afternoon VisitVisit Maria in the afternoon while she is pregnant. This triggers a tender and intimate scene that shows a softer, more vulnerable side of her during the pregnancy. Available for the entire duration of the pregnancy period after the storage room scene.
Maria at Home with a Cold
Tony’s ApartmentDuring Main Story Part 3, Tony sends you to his apartment to retrieve a duffel bag of equipment. Maria is home sick, resting on the couch. This is more of a brief story moment than a full scene but it shows her in a quieter, more domestic context outside the pizzeria.
Post-Daycare Resume
Pizzeria / Cookie JarAfter the baby is born and sent to daycare two weeks later, all optional scenes with Maria become fully replayable again through the Cookie Jar. Normal pizzeria interactions also resume. Visit in the afternoon for ongoing optional content access.
Pregnancy Route Timeline
Getting Maria pregnant is mandatory for completing the main story. The pregnancy follows a fixed in-game timeline from the storage room scene to the hospital birth and the daycare transfer. Both the phone call events and the hospital visit must be completed to progress the story. Missing the hospital message by ignoring notifications will block your next main story beat.
| Timeframe | Event | Action Required |
|---|---|---|
| Day 0 | Storage room scene | Choose to get Maria pregnant |
| Plus 1 Week | Tony’s good news call | Visit the restaurant after receiving the call |
| Plus 5 Weeks | Labor begins | Read the message and go to the Hospital |
| Labor Day | Hospital visit | Meet Tony and Maria at the Hospital |
| Plus 2 Weeks | Baby sent to daycare | No action required — optional scenes resume |
| Post Daycare | Normal activities resume | Visit afternoon for optional scenes via Cookie Jar |
The pregnancy timer runs in in-game days. When Maria goes into labor you receive a message notification. If you ignore it and skip multiple days without reading it the hospital scene will pass. Always check your phone messages after sleeping to make sure you do not miss the labor notification. Missing the hospital visit does not end the story but it removes a key Cookie Jar entry and delays progression.
Maria in Main Story Part 3
Maria makes two appearances in the final act of the main story. Neither is a full optional scene, but both are meaningful story moments that show how the relationship between Maria, Tony, and the main character has developed across the entire game.
Maria’s Two Appearances in Part 3
Both triggered automatically during the final act
Maria at Home Sick During the Equipment Retrieval
During the So Here’s The Plan stage of Part 3, Tony asks you to retrieve a duffel bag of equipment from his apartment. When you arrive you find Maria resting on the couch with a cold. You retrieve the bag from the bedroom without disturbing her. It is a quiet, domestic moment that shows her in a context entirely separate from the pizzeria and the mafia story.
Maria at the Pizzeria During the Final Regrouping
After the warehouse rescue where Debbie and Jenny are freed, everyone regroups at the pizzeria. Maria is there with Tony as the group contacts Nadya and plans the next steps. She does not speak much in this scene but her presence is a reminder of what Tony has been protecting throughout the entire story: his family, his home, and the life he and Maria built together.
Required Stats and Items
Maria’s route spans all three main story parts and requires different stats at different stages. Train early and consistently to avoid being blocked at the flour sack scene or the final boss fights. The item requirements are also spread across the route and involve multiple vehicle purchases that require careful money management throughout.
| Item | Purpose | Where to Get | Approximate Cost |
|---|---|---|---|
| Bike | First pizza deliveries | Consum-R store | Low cost |
| Cell Phone | Unlock Josephine’s help | Mr. Sato’s office diversion | No cash cost |
| Scooter | Faster delivery vehicle | Saga Dealership via Josephine | $1,100 |
| Swimsuit | Unlock pool access for tool bag | Mall | Small cost |
| Tool Bag | Required for small car unlock | Pool locker room fourth stall | No cash cost |
| Small City Car | Mid-story vehicle upgrade | Saga Dealership via Jiang | $4,500 |
| Office Vest | Required for sports car | Stolen from dealership office | No cash cost |
| Sports Car | Final vehicle upgrade | Saga Dealership | High cost |
| Binoculars | Spy on Russian hideout | Treehouse | No cash cost |
Tips and Tricks
The following targeted tips address the most common mistakes players make during Maria’s arc and the surrounding main story stages. Each tip is specific to a real problem that causes players to get stuck, lose money, or miss content.
Bank After Every Single Delivery
Throughout the entire routeThe Mafia ambush system is active from the moment you are hired and can trigger at any point during the day while you are outdoors. You will need over $6,000 in total for vehicles. Never walk around with large amounts of cash. Visit the bank after every delivery without exception.
Train Strength to 5 Before You Need It
Gym with Coach BridgetThe flour sack scene will block your story cold if you arrive without Strength 5. Do not wait until Stage 4 to start training. Begin visiting the gym from your first week of employment so that Strength 5 is reached well before the scene triggers naturally.
Save Before the Storage Room Scene
Evening before Stage 6 sceneThe moment Tony makes his request and you head to the pizzeria storage room in the evening, save your game manually. This is a one-way branching point. The scene cannot be undone after it begins and choosing not to get Maria pregnant blocks the entire main story from advancing.
Get All 4 Pizzas Right in Stage 3
Italian Job minigameSuccessfully completing all 4 handmade pizzas in the Italian Job stage unlocks the Mise en Bouche optional bonus scene. Follow Maria’s instructions on screen carefully. The minigame is straightforward but rushing through it causes errors that lock the bonus content.
Sleep at Debbie’s House After the Tina Scene
Before Stage 6 triggersIf you purchased the beach house and are sleeping there, the stage after the Tina and Becca scene will not trigger. The game requires you to sleep at Debbie’s house to progress. Switch your sleeping location before this stage if you own the beach house.
Check Messages Every Morning
During pregnancy periodThe pregnancy timeline sends two critical messages: one a week after conception and one when labor begins. Missing the labor message means missing the hospital scene entirely. Check your phone messages every morning after sleeping so you never accidentally skip the hospital visit.
This is the single most common reason players get confused about why the next Maria stage is not triggering. Each stage requires a specific number of completed deliveries AND a specific number of in-game days to have passed. Meeting one condition without the other will not trigger the stage. If you have done enough deliveries but nothing is happening, simply advance a few in-game days by sleeping and checking back at the pizzeria the next morning.
Quick Reference Flowchart
The flowchart below summarises the entire Maria arc from prologue to post-story in a single visual reference. Use it to track exactly where you are in the route and what the next required step is without re-reading the full walkthrough.
Maria Route End-to-End Flow
Complete sequence from Day 1 to post-story optional access
Prologue complete — map unlocked, school visited, Debbie and Jenny met
Three thug encounters survived — police visit, breakfast interruption, intimidation visit
Tony rescues you from ambush (Day 11+ after last encounter), visit restaurant next day, get hired
Buy bike at Consum-R, complete first successful delivery, begin banking every delivery
3 deliveries plus 3 days — Scooter arc, get cell phone, buy scooter for $1,100
5 more deliveries plus 4 days — ITALIAN JOB: Maria teaches pizza making, make all 4 correctly
4 more deliveries — Small car arc, tool bag from pool locker, buy city car for $4,500
8 total deliveries plus 5 days, Strength 5 required — Move flour sack, MARIA AND TONY FACE THE RUSSIANS WITH SHOTGUN
7 more deliveries — Sports car arc, steal vest, buy sports car, show Tony
10 more deliveries plus 4 days — Tina scene, sleep at Debbie’s, Tony’s request
SAVE GAME NOW — Go to storage room evening: CENTRAL MARIA SCENE, choose to get her pregnant
Plus 1 week — Tony’s good news call, visit restaurant, receive hideout address and binoculars
Evening — Spy on warehouse, knocked unconscious, transition to Main Story Part 2
Plus 5 weeks — Labor message received, visit Hospital for birth scene
Plus 2 more weeks — Baby sent to daycare, optional scenes with Maria fully resume, Cookie Jar replayable
Maria Route FAQ
Ready to Complete
Maria’s Full Arc?
Use the full walkthrough and Cookie Jar guide together for a complete main story run that captures every Maria scene, every optional moment, and every post-story interaction without missing a single entry.